Changelog
- 2025-11-23: Fix device positions to robot centre.
- 2025-11-15: Make stage 2 rubric more lenient.
- 2025-11-15: Clarify chaser algorithm and make runner2 starting position more consistent.
- 2025-11-12: Note to submit strategy rationale on Moodle.
- 2025-11-02: Removed no inheritance constraint and provided alternative starter code example.
- 2025-10-29: Increased freeze range to 0.15 metres.
- 2025-10-27: Extended deadline to Week 11 Friday.
- 2025-10-27: Initial release.
Background
This assignment combines C++ programming, simulation, and robotics logic into a fun game. You’ll see your code come to life and your robots move based on what you write!
You will be using the robotics simulation software Webots (version 2025a) to write code to control robots in a virtual environment.
The game is freeze tag where you will be playing as the runners against an autonomous chaser. Write C++ code to control 3 epuck robots (runners) in the Webots simulation to make them move, communicate, and avoid being tagged.
This is an open-ended assignment for you to form your own game strategy and class design. You will have to submit your code and a rationale for your strategy in a 1-page PDF.
Try to keep your runners alive for as long as possible. The game will end when all your runners have been tagged.
Learning Outcomes
- Think on a higher-level of program design to solve a robotics problem.
- Utilise object-oriented programming concepts to solve programming problems.
- Basic use of a robot simulator.
Summary
contributes 33% of your final mark
Due DateWeek 11 Friday, 11:59 PM
Late Penalty5% per day, submissions later than 5 days not accepted without approved special consideration
Prerequisite Knowledge
- C++ classes and inheritance
- Robot movement:
webots::Robot,webots::Motor,webots::PositionSensor - Robot communication:
webots::Emitter,webots::Receiver - Robot range finding:
webots::DistanceSensor,webots::Lidar - Robot navigation:
webots::GPS,webots::Compass
Getting Started
Setting up…
Ensure you have followed this guide. You should be able to run the Webots application locally on your machine.
Retrieving the starter code
To get the assignment starter code, use the GitHub classroom link on Moodle to gain access to your assignment repository and clone the repository locally.
Examining the starter code
The starter code is a Webots project with one world and two controllers:
epuck-tag
|_ controllers
|  |_ chaser_controller
|  |  |_ chaser_controller.cpp
|  |  |_ Chaser.cpp
|  |  |_ Chaser.hpp
|  |  |_ Makefile
|  |
|  |_ runner_controller
|  |  |_ runner_controller.cpp
|  |  |_ run.cpp
|  |  |_ run.hpp
|  |  |_ Runner.hpp
|  |  |_ Makefile
|  |
|  |_ runner_controller_2
|     |_ runner_controller_2.cpp
|     |_ Runner.cpp
|     |_ Runner.hpp
|     |_ Makefile
|
|_ worlds
   |_ arena.wbt
You are free to add and edit files inside the runner_controller directory. But do not edit runner_controller.cpp and anything outside of the runner_controller directory.
You will also notice there is a runner_controller_2 folder. This contains alternative starter code which has the same behaviour as the starter code in runner_controller. This alternative starter code has a Runner class which inherits the webots::Robot class. We provide this alternative starter code in case you want to closely-follow the lecture examples which uses inheritance rather than passing the robot object around. It doesn’t matter which starter code you choose. Neither will give a greater advantage or disadvantage when it comes to style or design marks.
Changes to starter code
When changes/fixes are applied to the starter code, this will be available in your GitHub repository. You must pull these changes to your local repository by running:
git pullSimulation Environment
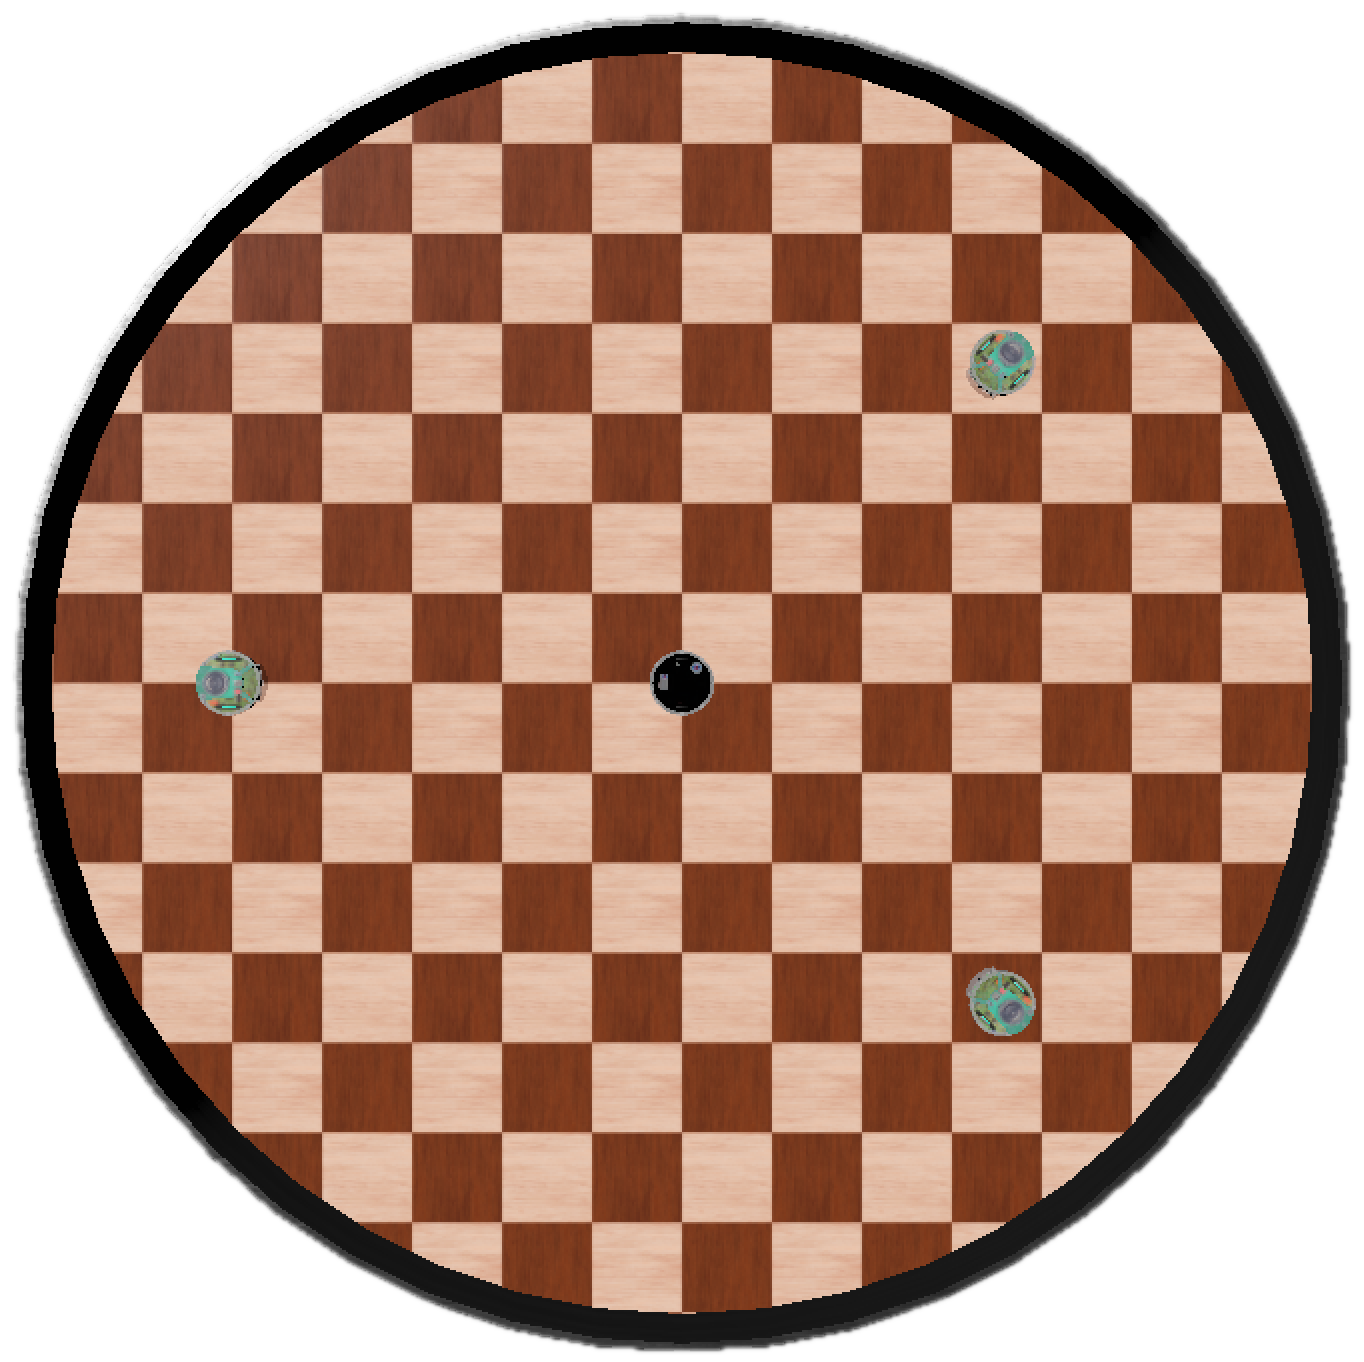
The simulation environment is a walled circle arena with 0.7 metre radius. It has grid flooring where each cell is 0.1 metres in width. The arena won’t have any obstacles within it.
There will be 4 epucks placed within the world. You can assume the epuck starting configuration will always be the same.
You are not allowed to modify the simulation environment or the robots within it.
Game Rules
This is a game of freeze tag between epucks. There are two types of agents:
- Chaser: attempts to tag (freeze) runners by getting close to them.
- Runner: attempts to avoid being tagged (frozen) and can help (unfreeze) other frozen runners.
You will play as the runners against an autonomous chaser.
There will be 1 chaser and 3 runners placed in the starting configuration. The chaser immediately begins chasing the runners once the simulation starts. All runners start in the unfrozen state and may move freely.
When the chaser gets within 0.15 metres of a runner, it emits a freeze message to that runner. Upon receiving a freeze message, the runner becomes frozen and stops moving immediately.
If an unfrozen runner comes within 0.1 metres of a frozen runner, it may help the frozen runner. Helping the frozen runner will unfreeze them and allow them to resume participating in the game.
The game ends when there are no unfrozen runners left.
This video below shows a sample game between a chaser and 3 runners (making random movements):
Chaser
You will not be coding the chaser. The chaser is already implemented and its code provided for you to play against. To run the chaser, you need to build the chaser controller in Webots.
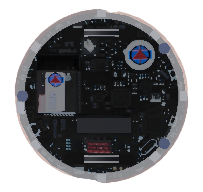
The chaser is the epuck marked with the black top:
The chaser’s goal is to tag all the runners in the game until there are no runners left unfrozen. Its behaviour is as follows:
- Identify the closest unfrozen runner as the target. If the game has just started, the runner will be
runner1instead. The chaser will not switch targets until the target is tagged. If the chaser gets close enough to another runner that is not the target, then that runner can still get tagged. - Go to the target’s current position. The chaser does not rely on any devices to seek the target. It uses special privileges to always know the location of the target at all times.
- If the chaser is within 0.15 metres of the target, tag it. The chaser will use its emitter device to send a message to the target to indicate it being tagged.
- Repeat until all runners are frozen. The chaser will stop, announce the end of the game, then chaser controller will terminate/exit.
The chaser will manage the game so it will always know who should be frozen and unfrozen (even if the runners break the rules).
Warning messages
The chaser has an emitter device which will emit its own position to every runner within a 0.7 metres radius. This message is sent every 1 second and to all channels.
The format of the message is:
t:warning:x,y,hWhere:
tis the timestamp of the message.warningis the message type.xandyare chaser’s x and y position in metres with ±0.3 metres absolute error.his the chaser’s heading in radians with ±0.3 radians absolute error.
Each part of the message is delimited by a colon (:) except for x, y, and h which are delimited by commas (,).
An example of three warning messages may look like:
1.04:warning:0.22545,0.224359,3.01162
2.048:warning:-0.317293,0.131969,2.66537
3.056:warning:-0.115643,-0.148366,0.448079
Freeze messages
The chaser will also emit a freeze message to tag runners within a 0.15 metre radius. This message is sent continuously and to all channels. The freeze message is simply:
t:freezeWhere:
tis the timestamp of the message.freezeis the message type.
An example of a freeze message may look like:
12.204:freezeSpecification
The chaser epuck will have the following parameters:
| Parameter | Value |
|---|---|
| Robot diameter | 0.071 m |
| Robot height | 0.05 m |
| Wheel radius | 0.02 m |
| Axle length (distance between wheels) | 0.052 m |
| Max motor speed | 7.536 rad/s |
| Warning emitter max range | 0.7 metres |
| Warning emitter channel | -1 (all channels) |
| Freeze emitter max range | 0.15 metres |
| Freeze emitter channel | -1 (all channels) |
Runner
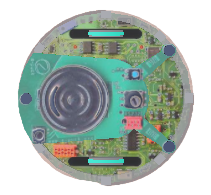
All runners will look like the following epuck - distinctly marked by the green top:
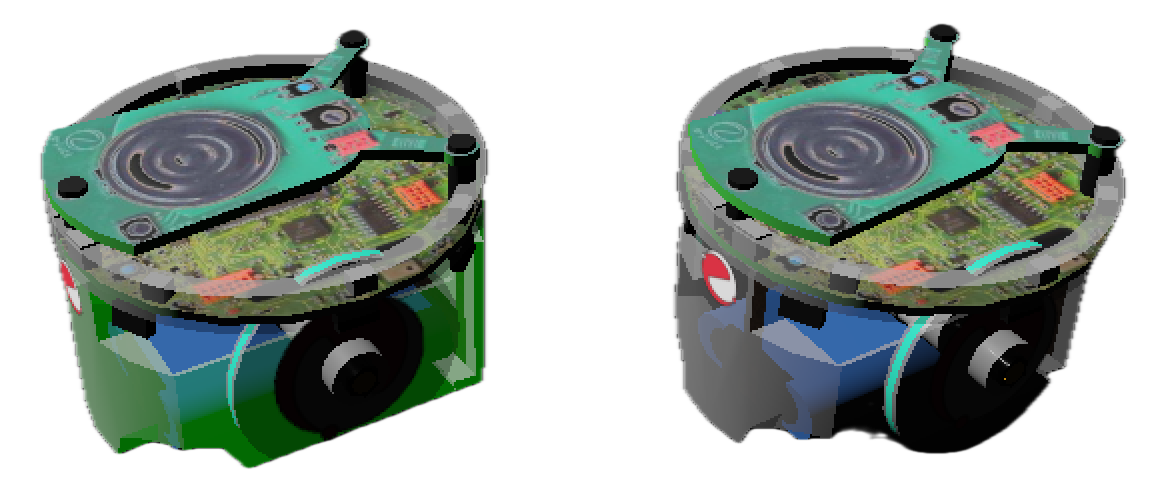
The runner has two states: frozen and unfrozen. The runner begins the game in the unfrozen state and is free to move. When the runner gets tagged, it will switch to the frozen state and immediately stops moving. These states are visualised on the epuck by whether its LED (device named “led8”) is turned on or off. The epuck on the left below has its green LED turned on. The epuck on the right has its green LED turned off.
The frozen runner can be helped out of this frozen state if there is another unfrozen runner within 0.1 metres. Helping a frozen runner will change the frozen runner’s state to unfrozen - it should have its LED turned back on and will be able to rejoin the game. You should use the runner’s emitter and receiver devices to communicate between the helper runner and frozen runner to achieve this.
The state diagram below will visualise all the states and transitions expected of the runner:
stateDiagram
    unfrozen: Unfrozen
    frozen: Frozen

    [*] --> unfrozen : start game
    unfrozen --> frozen : if tagged
    frozen --> unfrozen : if helped
    frozen --> [*] : all runners tagged
Locating the chaser
The runners do not not know where the chaser is. To survive longer, you should utilise the onboard devices to learn the chaser’s location and avoid the chaser. There are two ways you can do this:
- Use the chaser’s warning messages to estimate its position and heading but this has an error of 0.3 metres or radians, and the messages are only received every 1 second.
- Use the runner’s lidar to detect the chaser position within 0.4 metres with no error. The lidar is able to detect the arena wall and not able to detect other runners.
Frozen runners are allowed to continue detecting the chaser’s position and heading.
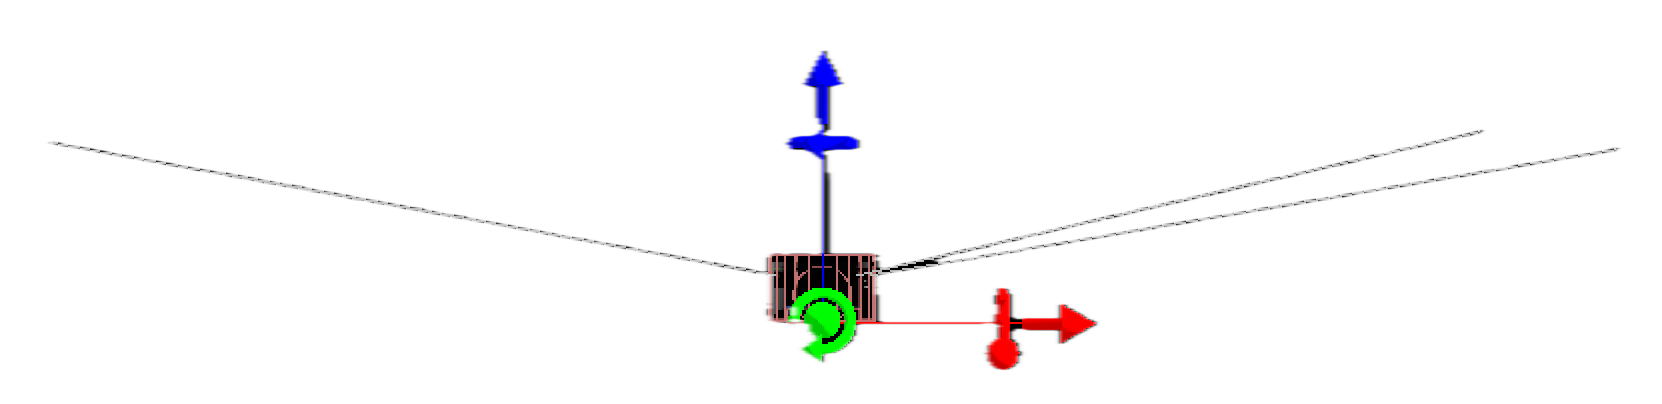
The distance sensors of the epucks will not be able to detect other epucks due to the slight upward angle the distance sensors are pointing (rays shown as grey lines below).
Specification
The runner epuck will have the following devices attached. You can only use the devices listed in this table:
| Device | Identifier | Parameter | Value |
|---|---|---|---|
| Left wheel motor | ”left wheel motor” | Max motor speed | 6.28 rad/s |
| Right wheel motor | ”right wheel motor” | Max motor speed | 6.28 rad/s |
| Left position sensor | ”left wheel sensor” | - | - |
| Right position sensor | ”right wheel sensor” | - | - |
| Emitter | ”emitter” | Max range | INFINITY |
| Channel | -1 (all channels) | ||
| Receiver | ”receiver” | Max range | INFINITY |
| Channel | -1 (all channels) | ||
| Compass | ”compass” | - | - |
| GPS | ”gps” | - | - |
| Lidar | ”lidar” | FOV | 360 degrees |
| Resolution | 512 rays | ||
| Min range | 0.01 metres | ||
| Max range | 0.4 metres | ||
| Distance sensors | ”ps0” to “ps7” | Type | Laser |
| Min range | 0.1 metres | ||
| Max range | 0.5 metres | ||
| LEDs | ”led8” |
You can set the emitter and receiver channels and range to other values if you wish.
The runner epuck will have the following robot parameters:
| Parameter | Value |
|---|---|
| Robot diameter | 0.071 m |
| Robot height | 0.05 m |
| Wheel radius | 0.02 m |
| Axle length (distance between wheels) | 0.052 m |
Strategy
Can you outsmart the chaser? There are 3 total runners for you to control which will all have the runner controller attached. You will need to design and implement a runner strategy in the runner controller. Remember that you just need to keep at least 1 of the runners alive for as long as possible.
The simplest strategy could be to make your epucks run to the edge of the arena and move around the perimeter. A smarter strategy would be to utilise the runners’ onboard devices to learn the location of the chaser, thus avoiding it. An even smarter strategy would be to get the 3 runners to work together as a team. Feel free to experiment what works and doesn’t work!
For the strategy that you decide to implement, you must submit a rationale (1-page PDF) explaining:
- What your approach is.
- Why you selected your approach.
- What devices you used.
- How your approach performed.
You are encouraged to include diagrams to support your rationale.
See the strategy rationale rubric for more information.
Software Requirements
Supervisor
You cannot use the webots::Supervisor class.
The chaser uses the
webots::Supervisorclass to get special privileges to know where the runners are at all times.
New files
You are free to create new .cpp and .hpp files to organise your code. Just remember to update the Makefile so that your runner controller is compilable.
You should not create any files or write any code outside of the runner controller.
Using libraries
You may #include any standard C++ libraries that you require. You should not use any other libraries (and especially OS-specific libraries).
C++ version
This assignment should be written with modern C++ practices. The starter code and environment supplied is running C++17. You should be writing all code that is supported by this version of C++.
Class Design
We provide the bare minimum starter code for this assignment so that you are free to pursue any class design you want. You can create whatever files, classes, and functions you want. Think carefully how to design your code such that it would follow best practices e.g.
- What classes should I have? And what responsibilities should these classes have?
- What functions should my classes have?
- Should my functions be public or private?
- Do I have any code repetition? Could I fix this using inheritance or functions?
- Are code that are not related to each other separated?
- Are code that are strongly related to each other grouped together?
Consider this simple (and not the best) class design:
class Runner {
public:
    void moveAwayFromChaser();
    void moveToHelpRunner();
    void checkFreezeMessages();
    void toggleState();
private:
    void driveMotors();
    bool mFrozen;
};
This would be an example of good class design since:
driveMotors()is only used internally so it is marked private and reduces code repetition.- Runner has appropriate responsibilities and does not do anything unrelated to the runner.
- Functions are descriptively named.
Consider this other class design:
class Runner {
public:
    void moveAwayFromChaser();
    void moveToHelpRunner();
    void driveMotors();
    void toggle();
    double distanceFormula(std::array<double, 2> a, std::array<double, 2> b);
    bool mFrozen;
};
This would be an example of poor class design since:
mFrozenanddriveMotors()should be marked private since they are only used internally.distanceFormula()does not belong in the Runner class since it is a general-purpose function.toggle()is a poorly named function since it does not describe what it toggles.
See the class design rubric for marking details.
Stages
The assignment is broken into two stages so that the assignment is easier to get started with.
See the Stage 1 rubric and Stage 2 rubric for detailed marking of these stages.
Stage 1 - Rules
This stage is marked based on if your runners can follow the game rules and requirements.
Start by implementing the basic functionality that your runners will need:
- Movement.
- Sending and receiving messages.
- Activating and deactivating LED.
- Toggling runner’s frozen and unfrozen state.
Stage 2 - Survival
This stage is marked based on how effective your strategy is.
Think about how you want to play the game. Start with designing and writing down your ideas, and translating your ideas into pseudocode.
Use divide-and-conquer to break up your coding into manageable chunks e.g.
- Start with one runner.
- Create helper functions like
moveForward()andturnRandomly(), etc. - Build a simple strategy first.
- Test and improve your strategy incrementally.
Related section: Strategy
Version Control
As part of this assignment, you will be required to use GitHub classroom. A repository has been established for all students and the starter code has been placed within this (it will NOT be released on Moodle). You will be expected to meaningfully use this version control platform as it is widely used in industry and provides a means of retrieving code in case of computer issues or getting old revisions of your work.
Testing
Use the Webots simulator to test your runners. Here are some basic scenarios that you can test:
- Test if a runner freezes when tagged.
- Test if a runner can unfreeze another runner.
Remember that each cell is 0.1 x 0.1 metres which you can use to eyeball distances.
If your controller isn’t working as expected or crashes, try debugging your code by printing out flags and important information e.g. GPS position.
Marking Criteria
The assignment in total is worth 33 of your course marks and is split into:
- Stage 1 (7 marks)
- Stage 2 (7 marks)
- Strategy explanation (5 marks)
- Class design (6 marks)
- Style (8 marks)
Stage 1 rubric
Stage 1 marks are awarded based on whether your runners can follow the game rules.
The marking will be done using automated tests that simulate various scenarios to check if your runners behave according to the game rules.
| Criteria | Marks | Subcriteria | Submarks |
|---|---|---|---|
| Stage 1 | 7 marks | Unfrozen runners freeze when tagged by chaser. Receives freeze message, stops moving immediately, and deactivates LED. | 3 |
| Unfrozen runners do not freeze when not supposed to. | 1 | ||
| Frozen runners unfreeze when helped by unfrozen runner. Activates LED and may start moving. | 2 | ||
| Frozen runners do not unfreeze when not supposed to. | 1 |
Stage 2 rubric
Stage 2 marks are awarded using percentile-ranking based on how long your runners can survive compared to all other students’ submissions.
Your runners will be tested in 12 different games against the chaser using the same starting configuration and chaser logic provided in the starter code. Your survival time in each game will be recorded and your average survival time across all your games will be calculated.
| Criteria | Marks available | Percentile range | Marks awarded |
|---|---|---|---|
| Stage 2 | 7 marks | [90.0, 100.0] | 7 |
| [75.0, 90.0) | 6 | ||
| [60.0, 75.0) | 5 | ||
| [45.0, 60.0) | 4 | ||
| [30.0, 45.0) | 3 | ||
| [15.0, 30.0) | 2 | ||
| [0, 15.0) | 1 | ||
| Students who did not do stage 2 and no-compiles. | 0 |
Strategy rationale rubric
You must submit a 1-page PDF containing your strategy rationale. It will be marked according to the following rubric:
| Criteria | Marks | Description |
|---|---|---|
| Strategy design and reasoning | 3 | Clearly explains the overall approach and logic behind the robot’s behavior. Justifies why this strategy was chosen, referencing game rules, robot capabilities, and anticipated challenges. Discusses key decisions and trade-offs. |
| Strategy implementation | 1 | Describes how the strategy was translated into code, including which devices and sensors were used, and how they support the chosen approach. Refers to specific logic, algorithms, or coordination between runners. |
| Reflection | 1 | Thoughtfully evaluates how well the strategy performed in practice. Identifies strengths, weaknesses, and any unexpected outcomes. Suggests concrete improvements or alternative approaches for future iterations. |
Class design rubric
Your class design will be manually marked using your submitted code according to the following rubric:
| Criteria | Marks | Description |
|---|---|---|
| Class abstraction | 2 | Classes have clear, focused responsibilities; appropriate use of inheritance; methods and properties are cohesive and relevant to the class purpose. |
| Class functions | 1 | Methods have single, well-defined responsibilities; appropriate use of public/private/protected access specifiers; avoid exposing internal details. |
| Code deduplication | 1 | Effective use of functions, helper methods, and classes to eliminate code repetition; avoids copy-paste logic. |
| High cohesion | 1 | Related code is grouped together in files, namespaces, or classes; each module/class/file has a clear purpose. |
| Low coupling | 1 | Classes and modules interact through well-defined interfaces; changes in one class do not require changes in others. |
In order to be eligible to receive full marks for class design, you must have made a reasonable attempt at Stages 1 and 2. If you only attempt Stage 1, your class design mark will be capped at 2/6.
Style rubric
Please refer to the C++ Style Guide for the detailed style guide. Your code style will be manually marked using your submitted code according to the following rubric:
| Criteria | Marks | Description |
|---|---|---|
| C++ style | 3 | Effective use of C++ features (e.g. smart pointers, STL containers, const, and type-safe casts). Code avoids outdated or unsafe practices. |
| Descriptive class, function, variable names | 2 | All names are clear, descriptive, and reflect their purpose. Naming style is consistent throughout the codebase. |
| Commenting | 1 | Comments are used to explain the intent, logic, and purpose of code, especially for non-obvious sections. Comments do not simply restate code. |
| Const correctness | 1 | Functions, arguments, and variables are marked const wherever possible to improve safety and clarity. |
| Consistent spacing and braces | 1 | Code follows a consistent indentation, bracing style, and spacing. No stray whitespace or formatting errors. |
| Penalties | - | Deductions for use of using namespace, void*, #define, or other discouraged practices. |
In order to be eligible to receive full marks for style, you must have made a reasonable attempt at Stages 1 and 2. If you only attempt Stage 1, your style mark will be capped at 2/8.
Submission
The assignment is due by 11:59 pm on Friday Week 11 (28/11/2025). We will use your GitHub repository’s latest commit. Any pushes past this deadline will be considered a late submission.
Ensure you have commited and pushed all your changes before the deadline. You will need to submit your strategy rationale as a PDF titled z1234567.pdf. Submit the PDF to Moodle and committed into the root directory of your GitHub repository.
Make sure in your GitHub repository, you only have one runner_controller folder:
- If you used
runner_controller_2then rename the folder asrunner_controller. - If you did not use
runner_controller_2then delete this folder.
Compiling code
If your code does not compile, we will try to fix your compiler errors so we can give you as many marks as we can. However, submitting non-compiling code will apply a 10% penalty on your Stage 1 marks. If your code needs more than 2 error fixes, then you will receive 0 for Stage 1.
Late Penalty
UNSW has a standard late submission penalty of: 5% per day, for all assessments where a penalty applies, capped at five days (120 hours) from the assessment deadline, after which a student cannot submit an assessment.
Plagiarism
If you are unclear about the definition of plagiarism, please refer to What is plagiarism?.
You could get zero marks for the assignment if you were found:
- Knowingly providing your work to anyone and it was subsequently submitted (by anyone), or
- Copying or submitting any other persons’ work, including code from previous students of this course (except general public open-source libraries/code). Please cite the source if you refer to open source code.
You will be notified and allowed to justify your case before such a penalty is applied.
AI Policy
You are only permitted to use AI to the level of “planning or design assistance” for this assignment. If you are unclear about what this means, please refer to Levels of AI assistance.
You should NOT use AI to generate code or write your report for you. If you do use AI for planning or design assistance, you must clearly document this in your submitted report (excluded from the 1-page limit). You should include:
- The AI tool you used (e.g. ChatGPT, Bard, etc.).
- The prompt(s) you used.
- A summary of how you used the AI-generated content in your assignment.
Failure to do so will be considered academic misconduct.